Micro Spinning and feltmaking gathering in Galway

Myself,  Ewa (http://craftobssesion.blogspot.com/) and Jagienka (http://2knitornot2knit.blogspot.com/) have gathered together to do some feltmaking and spinning.

Yesterday I have had another batch of 5 scarves which are to be sold at Limerick’s Milk Market the following Sunday. I have dyed hand rolled silks and have felted some dots onto it. This is a photo of the process:

Today I have been finishing felted pod brooches:

I love the balls, the colours came out very well. These brooches have a very organic shape and could have some sexual connotations :). So hopefully they would sell. It takes time to attach the pin to it.

In limerick though there was another meeting of the Irish Etsy craft team. Good luck girls and have a lovely night out!

Posted in Uncategorized | Leave a comment

Silk laps in use and processing

Working with silk laps:

first time I have bought my silk laps I cried, because I couldnt separate the sheets of silk! My skin was too rough and it pulled little strands of silk every time I wanted my hands to be free of silks! To separate the silk laps you should:

– peel off any dead skin from your hands or do a little feltmaking session using olive oil soap!

– rub a side of the silk lap to reveal the layers of silk

– separate delicately a thin layer and consistently pull it from main lap.

To dye silk laps:

you should pre soak the laps in water and vinegar acid, squeeze the excess of water well and lay it on plastic cling film. Apply your dyes and wrap up well. Steam for 15 minutes. Rinse and stretch to dry.

please note that when pulling the silk from the lap it becomes very fluffy, so when laying the silk lap on your felting table you should spray the surface  with soapy water.

Silk laps can be shaped and pulled so they present various possibilites for making lovely silk inlays. They are way faster to lay and produce interesting yet even results in the products. Finally silk laps support wool so the use of silk laps in feltmaking allows for faster bonding and fulling of the piece (approx 20 min for the whole process without using the sander)!

The result?

and

BTW:  I supply a range of silk laps both undyed and dyed. My silk laps are made from the best silk (grade A Mulberry) for best shine and quality.

Posted in felted scarves, materials | Tagged , , | Leave a comment

Ashford wash board versus plastic rugged mat

At the early stages of my feltmaking quest I was using a corrugated part of my kitchen sink to full my pieces. It was useful however the size of the ridges was too large for rolling felted dreads or shaping felted slippers. I have used it mostly for rolling  scarf bundles. At that stage the bundle was not wrapped in plastic and it was rolled directly on the sink.

In Ireland, and LImerick in particular I have been unable to purchase a wash board second hand, neither in the antique shop or online. So I have got an Ashford wash board.

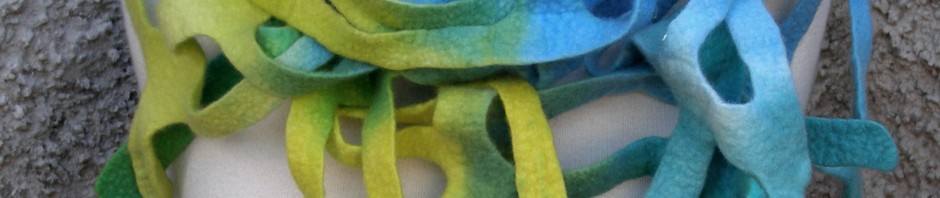
note that grooves are well finished and do not disturb the fibers at early stages

The board consists of two wooden panels joined seamlessly in the middle. The ridges are not too deep, and are shaped so the water is drained during the process. The size of the grooves is approx:6 millimeters, the size of the board:  (46 by 23 cm).

What I consider as a plus in terms of Ashford:

– well finished (sanded) grooves

– the quality of wood, while it soaks up the water, the water itself does does not affect the structure of the board

– the wood seems to be pre treated with something so there is no need for oiling it

– at the back of the panel there is a narrow wooden board which acts as a hinge. So it blocks the board from moving.

Negative: the price, at 35 pounds it is rather dear, however when buying standard wash board one might purchase something that does not fit the purpose so well (for instance the rigdes are risen in some boards which does not allow to evenly full the larger pieces). I suppose glass ridges and grooves might be little bitt too slippery as well (btw. has anybody got any experiences with regards to use of old wash boards in feltmaking?).

I  have also purchased a plastic mat for the same purpose. It is used for rolling scarf bundles (at early and later fulling stages). The grooves are rather small: (1-2 millimeters). The overall size is 50 by 80 cm. On this one I prefer to make my felted dreads and I tend to use it for rolling scarf bundles.

In the case of flower or slippers – I prefer ashford. I suppose the serrated rubber mat is less likely to disturb surface of felt when it is rubbed.

What is interesting here is that sanding on this surface results in permanent transfer of the shape of the grooves onto a felted piece.

Have you got any favorite fulling tools yourselves?

Posted in feltmaking tools | Tagged , , , , | Leave a comment

My new favourite tools

For some time I was intending to buy a smaller version of felting board. But it was never a necessity rather an additional gadget, so I have never acted upon the issue of what I call a ‘mini felter’. Up untill, I flicked through a book by Anette Quentin-Stoll, called Filz-Play, or Filz Spiel. This is what I saw there:

Annette was basically using this nifty tool to finish hat brim. This has inspired me to start my journey into hatmaking (about which I will write soon!). The tool arrived from Wollknoll.eu (32Eu). It is nicely finished, very well polished and the ridges are smooth. The only downside is the lack of a hole to hang the tool in the workshop. The surface with the ridges is eliptical which enormously has increased the comfort of use. Despite a hefty price (consider felting board from Ashford for 39 pounds) is is a lovely thing to have, nicely balanced and well designed.

Anette herself is a very talented feltmaker. Her first book, Filz – Spiel, in a precise and clean way (very nice photography) presents a set of very simple ideas that allow to built a woolen world of  tactile wonders. For instance her tactile play mat (see wonderful post by Nicola Brown, http://clasheen.wordpress.com/2009/03/25/the-completed-tactile-felt-play-mat/ contained various pleated shapes, just like this one:

I loved the idea of felted finger puppets which she has presented in the book: here is my recreation of it. Her puppets are standing straight, whilst mine are sligtly bent because I have kept the resist up to the last minute of fulling stage.

This book offered wonderful inspiration but limited explanation how to!

So it has very much driven me to try to figure out the ways in which such pleated shapes can be inserted into felted hats for example. The next book released last year, called Filz Experiment (available in German only) provides all answers I was looking for.

Consider this hat:

the basic shape is semi felted and then tied in as in shibori dyeing. A very nifty technique, which allows getting  lasting results without too much hassle. Such tied, prefelted hat can be easilly thrown into the washing machine for 1 or 2 minutes to speed up the process. The newest book presents these techniques, and much much more. Again, a masterpiece in terms of editing and quality of the images. Unlike other books on feltmaking, usually called 34 craft project in felt (etc,.. I am referring here  to a specific type of genre in general) – and which reproduce one image up to 4 times in the same book; which relentlessly describe what is obvious and which present underfelted accessories, this book is proper and certainly worth the price. Shame it is not translated into English but you can figure out the stuff for yourself from pictures. If you are going to ask me which ones to buy I would say both, but otherwise buy the second one.

Posted in feltmaking tools | Tagged , , , | Leave a comment